
How to Access WordPress Site if Locked out by Wordfence 2FA Leave a comment
If Wordfence 2FA (Two-Factor Authentication) has locked you out of your WordPress website, observe the 2 steps on this information to regain entry.
Step 1: Install FileZilla
FileZilla is a well-liked Secure File Transfer Protocol (SFTP) software program required to FTP to your WordPress website’s backend. If you haven’t put in FileZilla, obtain and set up it earlier than continuing to Step 2 under.
Step 2: Disable Wordfence
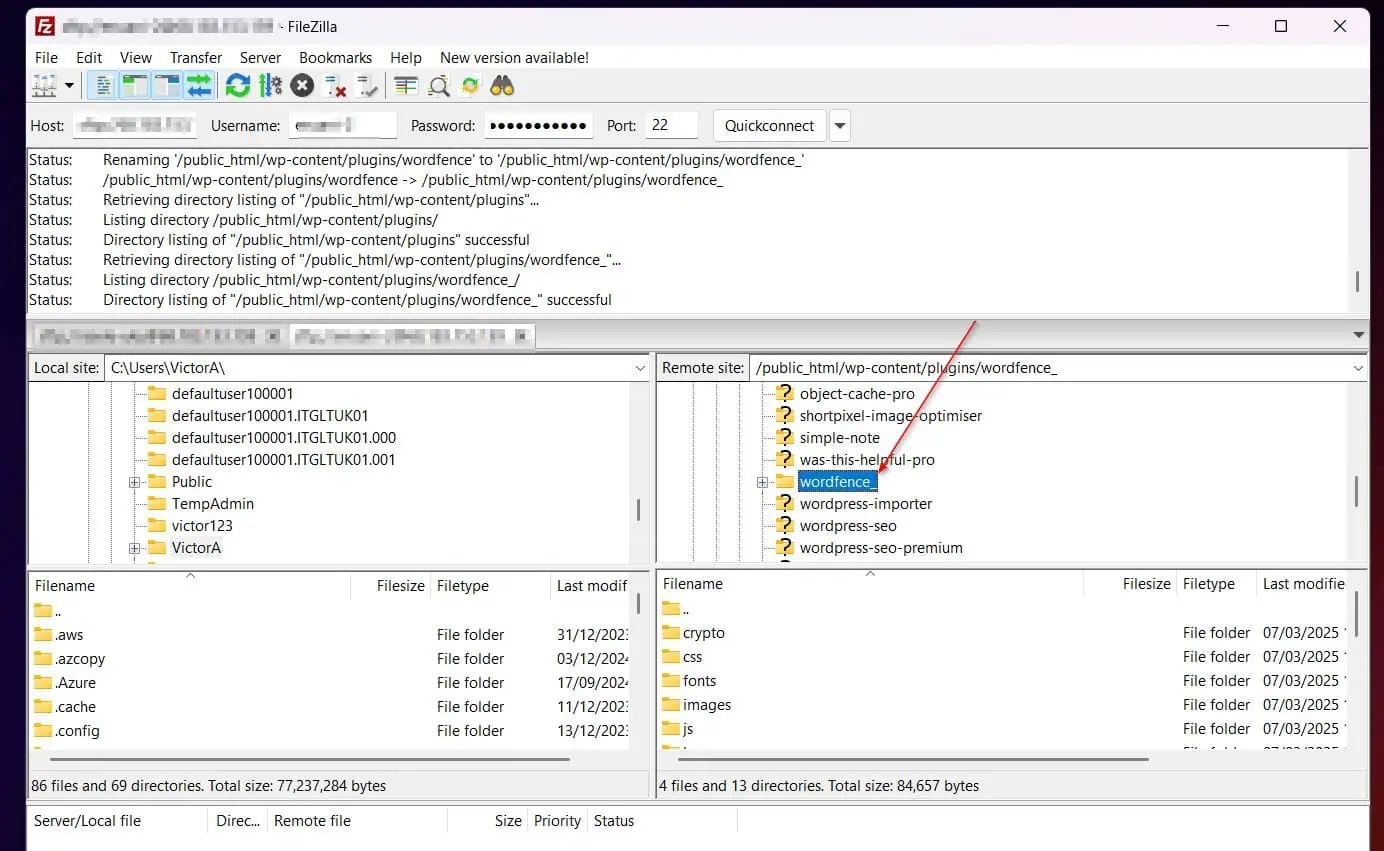
- Open FileZilla and enter your WordPress internet hosting Server’s IP deal with within the Host discipline, SFTP username and password, and the port (22 for SFTP). After getting into the small print, click on Quickconnect.

- Once you efficiently FTP to the server, navigate to “/public_html/wp-content/plugins,” right-click the wordfence folder, choose Rename and append “_” to the top with out the quotes.
Renaming the Wordfence plugin folder routinely disables the plugin and the 2fa.
Step 3: Sign in to WordPress
After disabling the Wordfence plugin, you need to be in a position to check in with out 2fa.
Step 4: Re-enable Wordfence
While logged in to WordPress, return to the FileZilla and rename the Wordfence plugin folder to its authentic identify, with out the “_”. Once you do this, the plugin might be activated.
Once it’s activated, open the Wordfence Login Security web page. Then, disable and re-enable 2FA.
Conclusion
If you’re locked out of your WordPress website by Wordfence 2FA, it may be scary, however recovering your website could be very easy. As this information demonstrates, all you want to do is check in to the host server by way of an FTP consumer like FileZilla.
Once you check in, navigate to the Wordfence plugin folder and rename it. After renaming the folder, the plugin is deactivated, which permits you to check in with out requiring a 2FA.
Finally, from the FTP, rename the Wordfence folder to its authentic identify, then, again in your WordPress dashboard, deactivate and reactivate 2FA.
I’m assured I made your day with this information, however I would love to hear from you. Provide suggestions by clicking the “Was this page helpful?” suggestions request under.