
How to Renew an Expired AD FS Certiticate Leave a comment
Read this information to learn the way to renew expired certificates in Active Directory Federation Service (AD FS) and their WAP servers.
Step 0: Review the Problem Background and Overview
Earlier at this time (eighth April 2025), my supervisor instructed me that the certificates in our AD FS servers had expired. He had already bought a brand new publicly signed certificates.
So, my process was to renew the certificates within the AD FS servers.
When an AD FS certificates expires, the service stops, and customers can not entry it. Needless to say, resolving this drawback was a excessive precedence.
I’ve by no means carried out this process earlier than, so I did just a few net searches and located this text: ADFS: Changing the Certificate. The referenced article is nice, but it surely coated simply the steps to renew the AD FS certificates, not the WAP server certificates.
An additional search led me to one other article, – Replace ADFS/WAP SSL certificates – which confirmed me how to renew the WAP servers’ certificates.
While these referenced articles are nice, none supplied a complete step-by-step information to performing this all-important SysAdmin process. After efficiently renewing the certificates in my servers, I made a decision to doc the total steps for my readers.
Here are they’re:
Step 1: Get a New Publicly Signed Certificate
This step is clear, however I included it for completeness. You can order a certificates from any certificates supplier.
Meanwhile, it can be crucial to be sure that the certificates meets the necessities outlined in necessities for ADFS tlsssl certificates.
Step 2: Add a Temp Self-Signed Wildcard Cert to ADFS
Since ADFS requires some certificates to operate, use the steps beneath to create and add a brief self-signed wildcard certificates to the first AD FS Server.
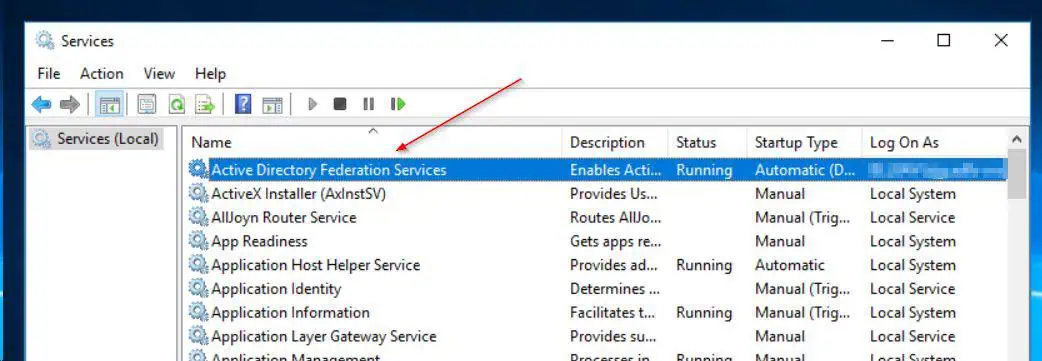
- If the AD FS service is stopped, begin it. To do that, seek for and open the Services MMC, right-click the Active Directory Federation Services service, and choose Start.
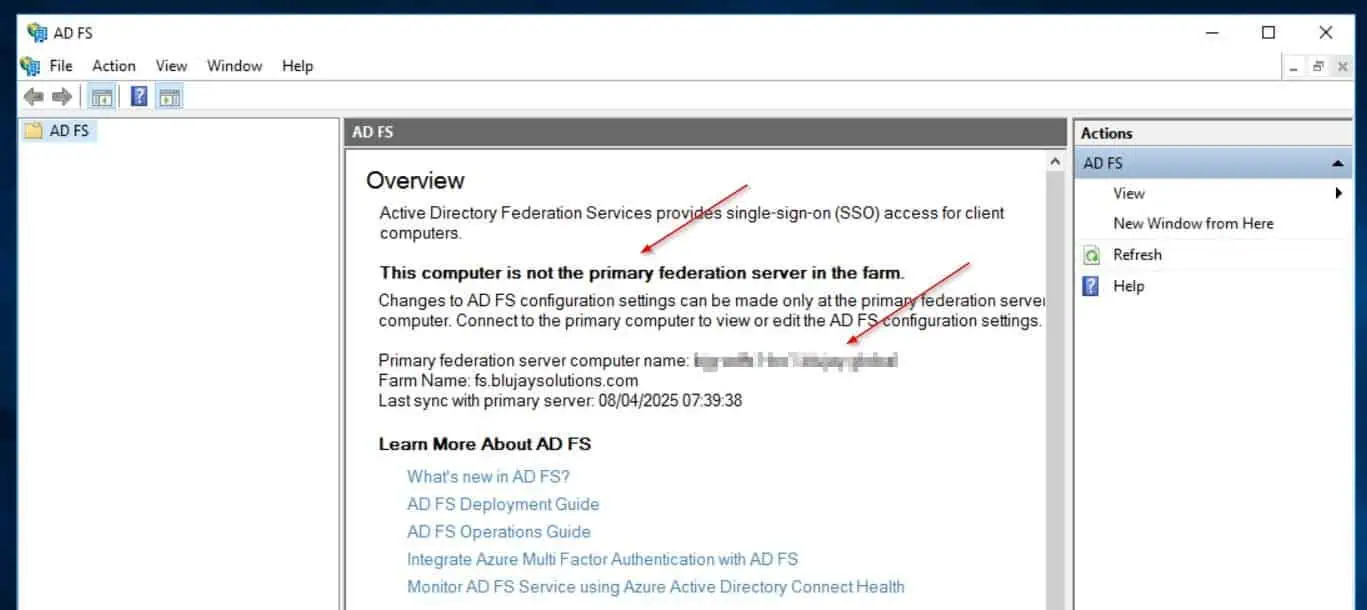
- To verify that the AD FS server you’re signed in to is the first server, open the AD FS Management console through Server Manager.

If the server is the first server, it can show the AD FS providers. The secondary Federation server – see my second screenshot beneath – is not going to show the AD FS service.

The secondary server additionally shows the first federation server (blurred in my screenshot beneath).
- Sign in to the first AD FS server and open Windows PowerShell as administrator. Then, run the command beneath to get the standing of the present certificates.
Get-ADFSCertificate –CertificateKind token-signing
As seen within the certificates’s Not After property, it expired in March 14th 2025.

- After that, allow certificates rollover and generate a brand new certificates by operating these instructions.
Set-ADFSProperties -AutoCertificateRollover $true
Update-ADFSCertificate –CertificateKind token-signing

- Finally, confirm that the self-signed cert has been assigned to the AD FS server by operating the Get-ADFSCertificate command once more:
Get-ADFSCertificate –CertificateKind token-signing
The command’s outcomes ought to listing two certificates. One ought to have a Not After date sooner or later, whereas the opposite ought to have the IsPrimary worth False.


Step 3: Import the New Public Signed Cert to the AD FS Server’s Local Store
Perform the steps on this part on the major and secondary AD FS servers.
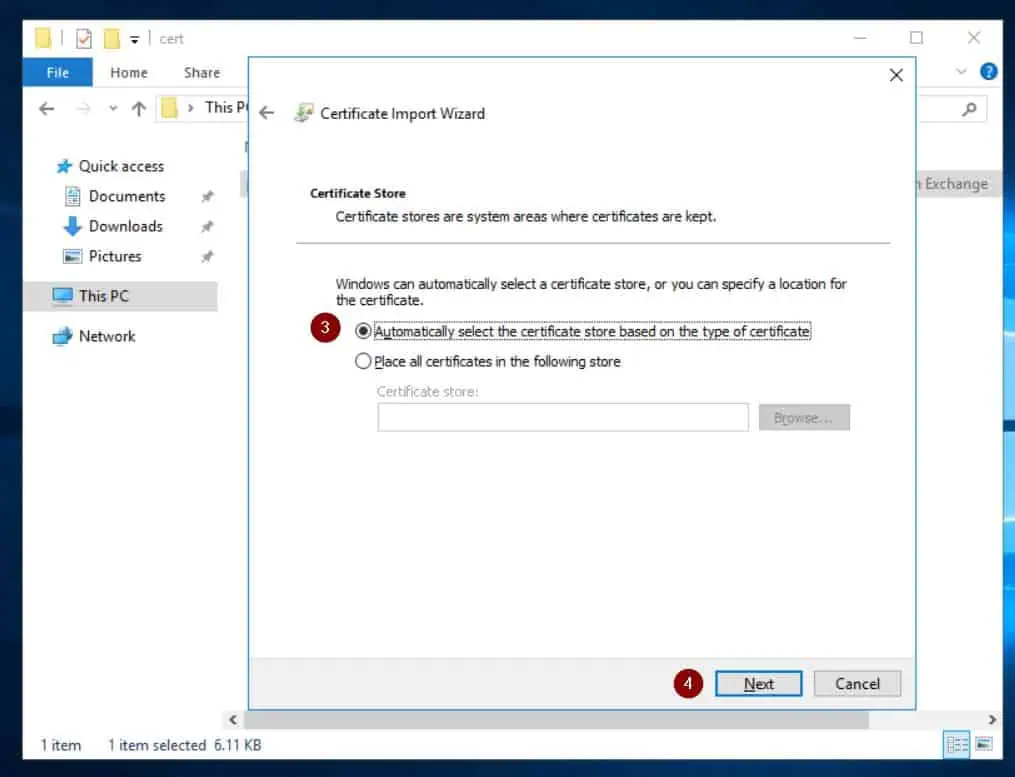
- Double-click the PFX file of the certificates you bought from a certificates supplier in Step 1. Then, on the primary web page of the import wizard, choose Local Machine.
If you select the primary possibility—Current person—you received’t have the option to set the AD FS server to use this certificates later on this information.
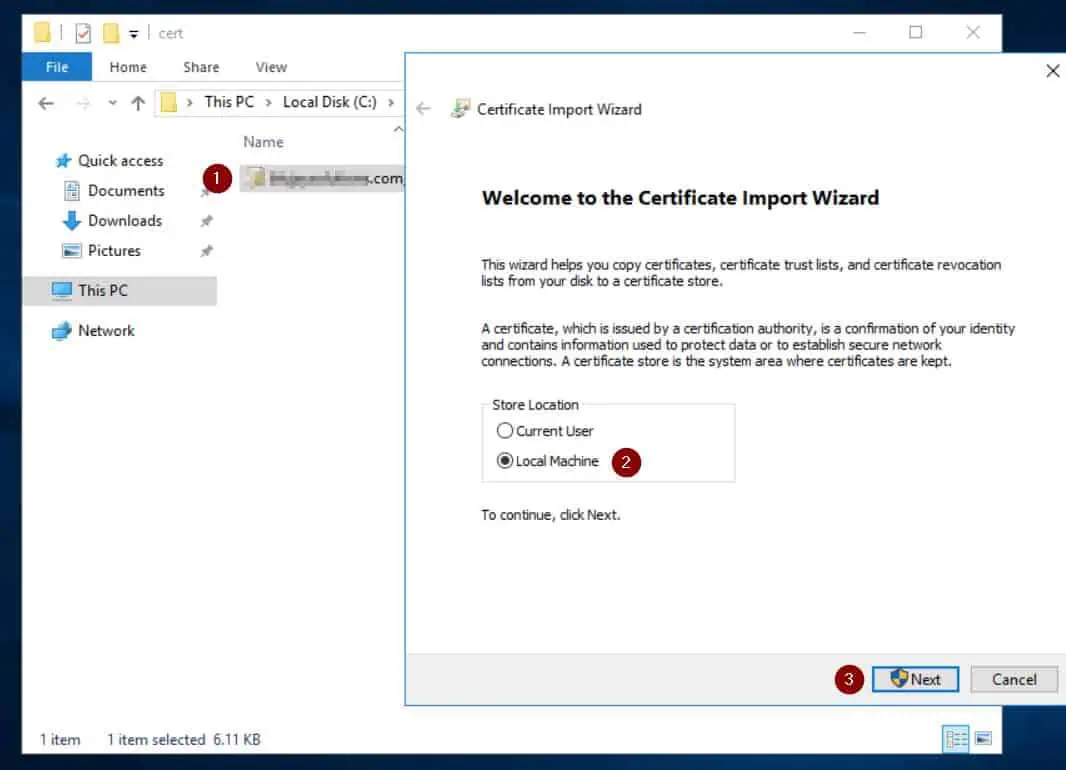
- The certificates’s file path will probably be displayed on the next web page. Click Next to proceed to the following web page.

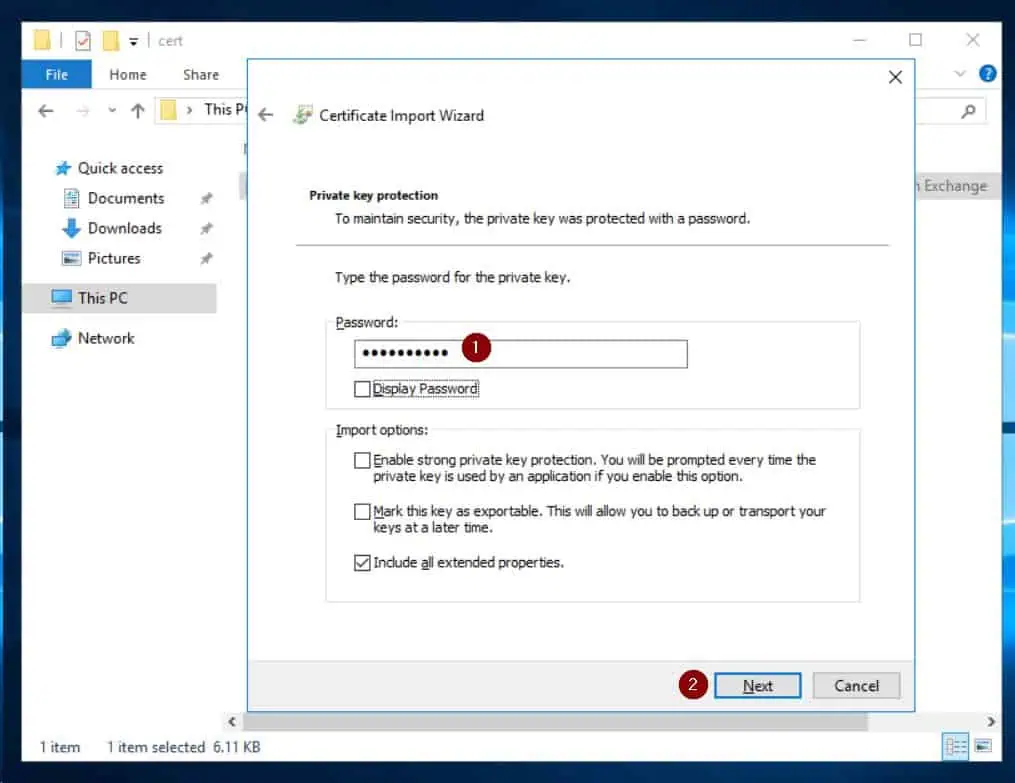
- Finally, enter the certificates’s PFX password and import it to the native pc’s certificates retailer. See my screenshots beneath for steerage.
Repeat the above steps within the secondary AD FS server. Then, run the command beneath on the major server to disable the AD FS certificates rollover.
Set-ADFSProperties -AutoCertificateRollover $false
Step 4: Grant the AD FS AD Service Account Access to the Cert Private Key
- Get the title of the Active Directory Service account for AD FS from the Log On tab of the properties of the Active Directory Federation Services service. You require this account later on this part.
Search for and open Services. Then, right-click Active Directory Federation Services, choose Properties, then the Log On tab.

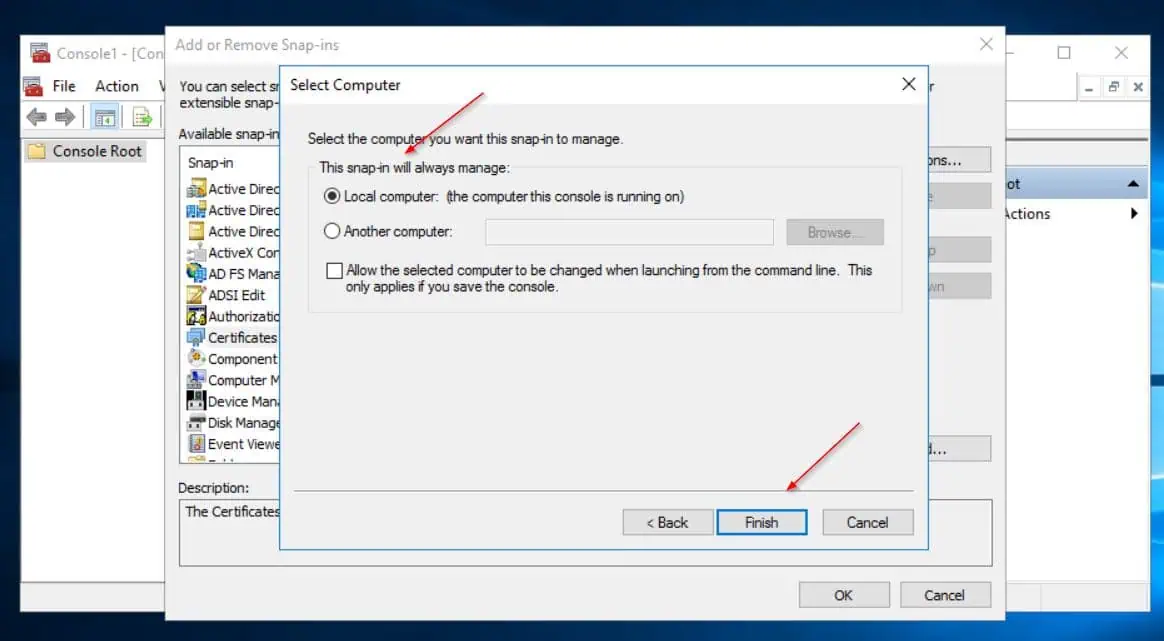
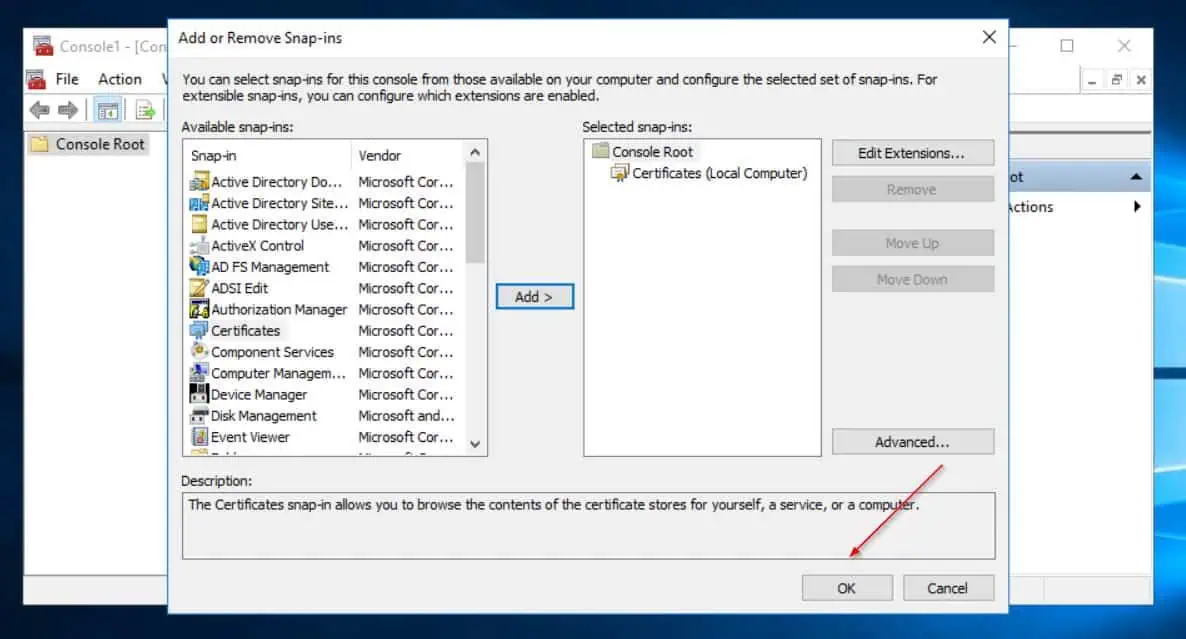
- Search for and open MMC as administrator (right-click MMC from the search end result and select Run as administrator).

- Then, on the MMC, click on File and choose Add/Remove snap-in…Then, choose Certificates > Add.


- Next, select Computer account on the Certificate snap-in wizard, then click on Next. Finally, select Local pc (the pc this console is operating on), then choose Finish, OK. See my screenshots beneath for steerage.

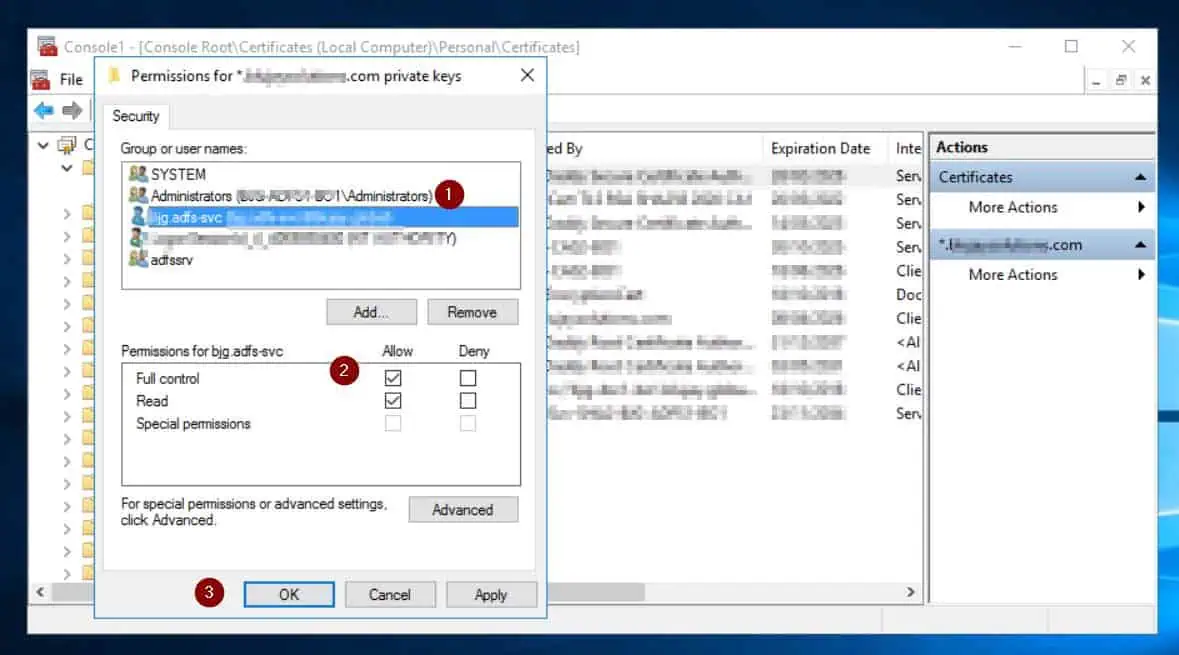
- Expand Certificates (Local pc), Personal and left-click Certificates on the MMC console. Then, right-click the certificates you imported in Step 3 and level to All Tasks > Manage Private Keys.
The most up-to-date cert ought to have an expiry date sooner or later.

- The above motion opens the Permissions properties for the certificates’s non-public keys. Click the Add button.

- Then, click on Object Types > Select Service Accounts, OK. After that, enter the title of your AD FS service account within the Enter the thing names to choose area and grant it full management.

Repeat steps 1 to 5 above within the secondary AD FS server.
Step 5: Renew the Certificate within the AD FS Servers
- Launch the AD FS administration console (through Server Manager). Then, broaden Service > Certificates and select Set Service Communication Certificate.
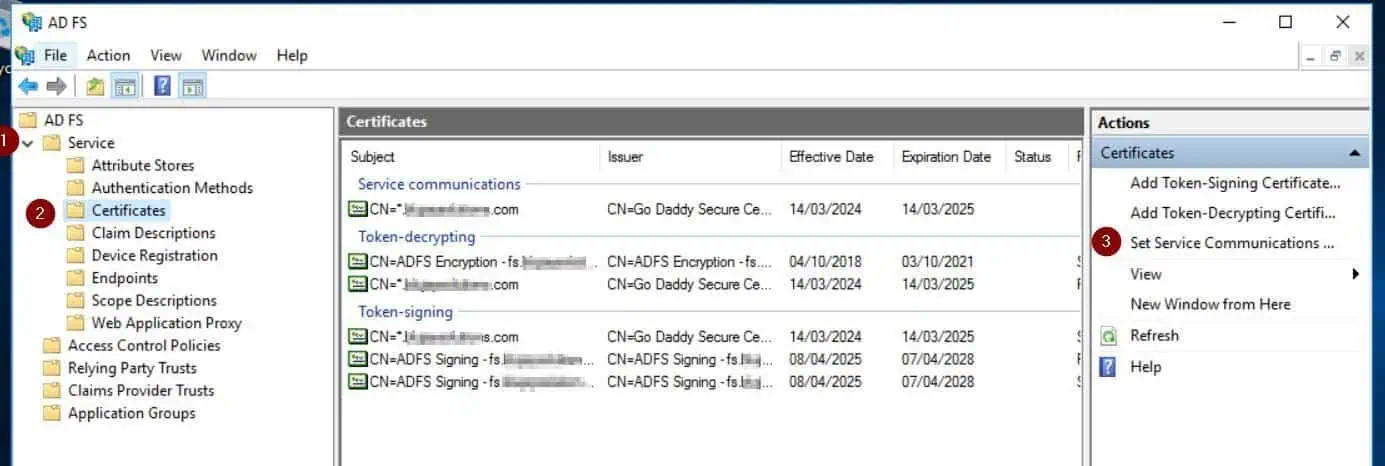
- On the Windows Security pop-up, choose More decisions. Then, select the brand new certificates and click on OK.


- Repeat steps 1 and a couple of above to exchange the Token-decryption and Token-signing certs. Finally, delete all of the previous certificates.
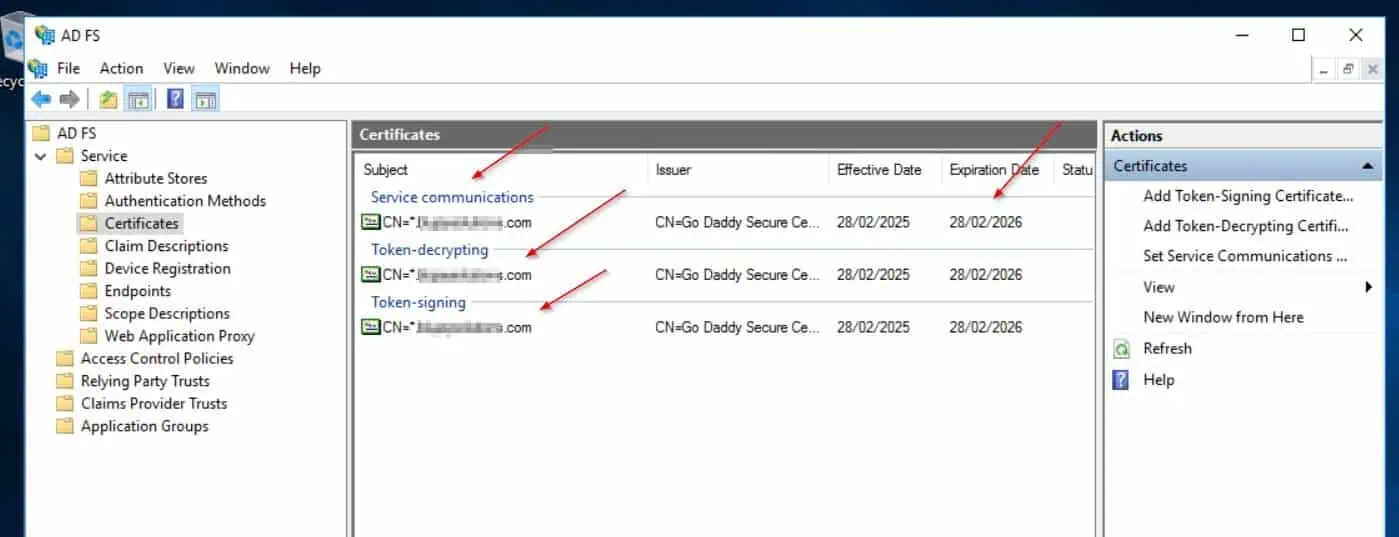
- When you end the above steps, the brand new certificates ought to be listed for the Service communications, Token-decryption, and Token-signing sections of the Certificates blade.
- After that, get the certificates’s thumbprint by right-clicking it, choosing View Certificate, and selecting the Details tab > Thumbprint. Then, choose and duplicate the certificates’s thumbprint with Ctrl + C.


- Paste the thumbprint in a notepad and take away all areas.

- Run the command beneath – from the PowerShell console you opened as administrator – to re-enable AD FS rollover. Then, verify that the brand new certificates is on the market in AD FS by operating the second command.
Set-ADFSProperties -AutoCertificateRollover $true
Get-adfsCertificate
- After that, set the AD FS server to use the brand new cert by operating the command beneath. Replace every little thing in daring together with your cert Thumbprint.
Set-AdfsSslCertificate -Thumbprint <enter your certificates thumprint right here>
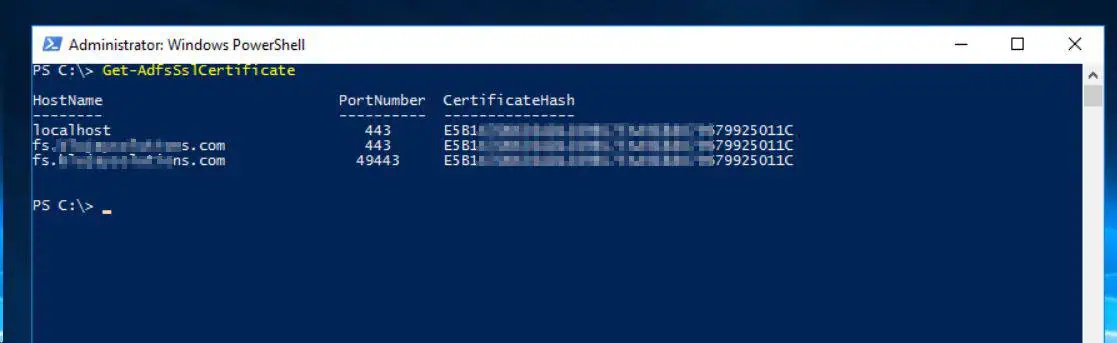
- Then, set the cert rollover to true and restart the ADFS service. Finally, run the Get-AdfsSslCertificate command to verify that the AD FS server makes use of the brand new certificates.
Set-ADFSProperties -AutoCertificateRollover $true
Restart-Service ADFSSRV
Get-AdfsSslCertificate

Step 6: Renew the Certificate on the AD FS WAP Servers
- Copy the PFX file of the general public signed certificates to your first AD FS WAP server and repeat Step 3 (hyperlink opens in a brand new browser tab) part of this information.
- After that, open PowerShell as administrator and run these instructions.
#1. Configure the WAP service to use the brand new certificatesSet-WebApplicationProxySslCertificate -Thumbprint <enter your certificates thumprint right here>
#2. Re-establish the proxy belief of the WAP server with the AD FS server. This command will immediate you to enter an AD account with permissions to the AD FS service
Install-WebApplicationProxy -CertificateThumbprint <enter your certificates thumprint right here> -FederationServiceIdentify <enter your AD FS federation service FQDN right here>
#3. Finally, replace the SSL cert for each revealed app
Get-WebApplicationProxyApplication | Set-WebApplicationProxyApplication -ExteriorCertificateThumbprint <enter your certificates thumprint right here>


- Repeat steps 1 and a couple of above in your second WAP server.
Conclusion
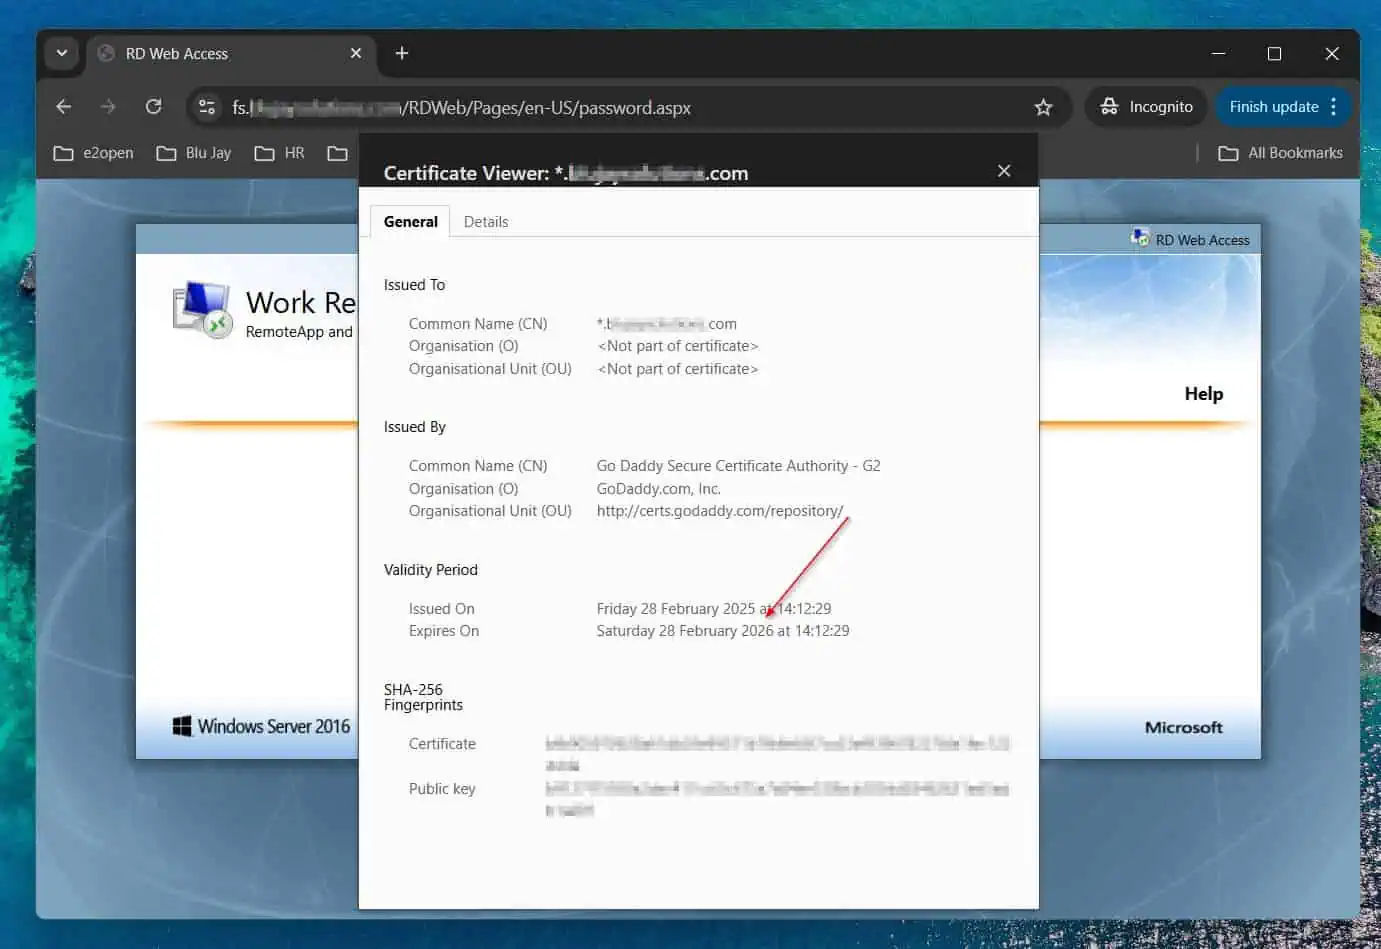
After finishing the steps outlined on this detailed information, if you open the front-end website of your AD FS service on a browser, it can now not show a certificates error. Furthermore, in the event you open the location’s certificates, it ought to show the brand new certificates.
I admit that renewing a certificates in an AD FS server is comparatively complicated. Following this detailed information, I’m assured you will have accomplished the duty efficiently, however I might nonetheless like to hear your ideas.
Let me know what you concentrate on this information and in the event you met your aim by following it. You can present suggestions by responding to our “Was this page helpful?” suggestions request beneath.